Under Exposed

This is when the settings on the camera have not allowed enough light to be captured. This will result in an overall dark image. There may be areas of the image that are totally black.
Properly Exposed

This is when the settings on the camera have allowed the right amount of light to be captured for the shooting conditions. Usually - little/nothing will be totally white and little/nothing will be totally black in a properly exposed image.
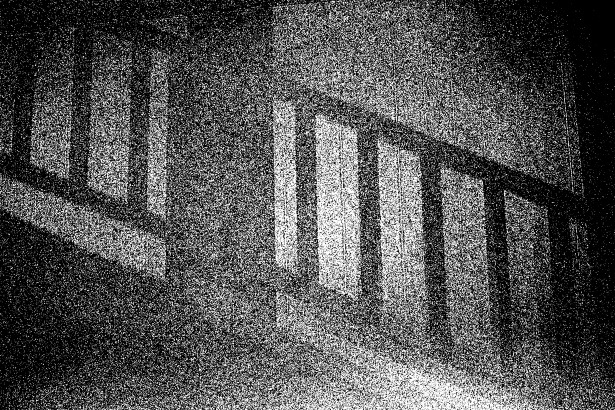
Over Exposed

This is when the settings on the the camera have allowed too much light to be captured. This will result in an overall image that is too bright. There may be areas of the image that are totally white or areas where the color is washed out.

Areas around the sun are intentionally "blown out". This better tells the story of brightness and summer warmth.

Only the strongest edges are properly exposed. The rest is black making this story much more dramatic.
Tools That Setting Exposure Gives Us
Setting exposure can give us some powerful tools to help tell our story.
In the very act of setting the exposure, you are causing certain effects to take place. If you know the story you want to tell and which effects will help best tell your story, you will know how to manually set the exposure settings on your camera.
Effects From Setting Exposure

Sense of Motion
Blurred Motion
Frozen Motion

How much Is In Focus
Shallow Depth of Field
(very little in focus)
Wide Detpth of Field
(a lot in focus)

How much Grain/Noise (Quality)
Smooth and High Quality
Grainy and Low Quality
(image from public domain photos)

For the image above, as you move toward the left you are capturing MORE light so your exposure will be brighter. As you move toward the right, you are capturing LESS light so your image will be darker.
Shutter Speed: Motion

HOW IT CONTROLS LIGHT
Controls the amount of light entering your camera by controlling how long light is collected. Older cameras had a mechanical device that opened and closed. Newer cameras simply set the time light is recorded. But it's always referred to as shutter speed.
Fast Shutter - light is recorded for very small amounts of time (i.e. 1/8000 of a second - take a second, divide it into 8000 parts and one part is how long the camera collects light). The faster the shutter, the more motion will be frozen. Sometimes you will just see a number like 100 but this really means 1/100 second.
Slow Shutter - light is recorded for long amounts of time. Shutter speeds in seconds are written with an " so 2" means 2 seconds. You can have the shutter open for HOURS. The slower the shutter, the more motion will be blurred. You will need a tripod with slow shutters because the slightest jiggle can blur your image.
EFFECT
Controls the sense of motion
- Freeze Action - a fast shutter will stop motion
- Blur Motion - a slow shutter will blur motion
Aperture: Depth of Field

HOW IT CONTROLS LIGHT
Also called F-Stop, this controls the amount of light entering your camera by controlling how wide the lens opens.
Wide Aperture - Wide lens opening which is a small number (f2.8) means more light enters the camera. This will give a shallow depth of field meaning less of the scene will be in focus.
Small Aperture - Small lens opening which is a big Number (f22) means less light enters your camera. This will give a wide depth of field meaning more of the scene will be in focus. Think of squinting your eyes to focus on more.
EFFECT
Controls how much of the scene is in focus. Imagine the space from the tip of your lens out to as far as you can see....
- Shallow Depth of Field - only one thin slice in that range is in focus (the effect of a wide aperture)
- Wide Depth of Field - most in that range (from your lens to the horizon) is in focus (the effect of a small aperture)
There are two other ways to control depth of field in addition ot using aperture and those are described below.
ISO: Grain

HOW IT CONTROLS LIGHT
Controls the amount of light your camera records by controlling how sensitive your sensor is to light.
- Low ISO - less light is saved
- High ISO - more light is saved
EFFECT
This also controls how grainy an image appears
- Low Grain/Noise - a low ISO gives low grain so you get a higher quality image
- High Grain/Noise - a high ISO gives high grain so you get a lower quality image
But here's the thing: you can easily add grain to a photo in post processing. It's MUCH easier to add grain than it is to remove it in post. So I had much rather use the lowest ISO I can for the shooting conditions to get as clean an image as possible. I can then later easily add grain in post to help tell my story if I so choose, but I will also still have the option of a clean image if I've captured the original RAW with a low ISO.
Image from public domain photos
Depth of Field
A Special Case
There are actually THREE things that can alter depth of field!
Focal Length
This is how zoomed in (telephoto) or zoomed out (wide angle) you are shooting.
Zooming in "compresses" the scene but it also makes depth-of-field more shallow (less of the scene will be in focus)
Zooming out gives a wider depth-of-field (more of the scene will be in focus)
Aperture
Also called F-Stop, this controls the amount of light entering your camera by controlling how wide the lens opens.
Wide Aperture - Wide lens opening which is a small number (f2.8) means more light enters the camera. This will give a shallow depth of field meaning less of the scene will be in focus.
Small Aperture - Small lens opening which is a big Number (f22) means less light enters your camera. This will give a wide depth of field meaning more of the scene will be in focus. Think of squinting your eyes to focus on more.
Focus Distance
This is how far you are from what you are focusing on.
If you are close to the subject you are focusing on, this will give you a shallower depth of field (less of the scene will be in focus).
If you are further away from the subject you are focusing on, this will give you a wider depth of field (more of the scene will be in focus).

Understanding Aperture

The above image is showing how aperture alters depth of field. The wider the aperture (small number) the shallower the depth of field. Purple is what will be in focus.
Putting it All Together

This image has a very shllow depth of field. This was shot at f2.8 at close range with a 200mm telephoto lens. Notice how only a thin slice is in focus.

ALL of these scenarios capture the exact same amount of light.
In the above image, we've determined that ISO will remain constant so the quality of our images will remain constant as will the sensitivity of the camera to light.
- Scenario 1 - faster shutter speed (1/250 of a second), shallow depth of field (f4)
- Scenario 2 - medium fast shutter speed (1/125 of a second), medium depth of field (f5.6)
- Scenario 3 - slow shutter speed (1/60 of a second), wide depth of field (f8)
Each scenario will give us a different effect - do we want shallow depth of field? Do we want stopped action? Knowing the answer to this tells us which scenario to pick. But to know that answer, we have to know what story we are trying to tell.
In the first scenario we have a very shallow depth of field with the wide aperature (small number at f4) and a chance of freezing some action with a faster shutter at 1/250 of a second.
As we move down the scenarios, we have the possiblity of capturing blurred motion with a slower shutter (1/60 of a second) and more of the scene being in focus with a small aperture (bigger number at f8).

ALL of these scenarios capture the exact same amount of light.
In the above image, we've determined we want the aperture to remain constant.
If we increase ISO, the camera is more sensitive to light so we must compensate with the only thing left.. shutter speed .. We must take in less light to compensate for the increased sensitivity given by raising ISO so make the shutter speed faster so less light has time to enter the camera.
- Scenario 1 - higher quality image (low ISO of 100), slower shutter speed (1/250 of a second), shallow depth of field (f4)
- Scenario 2 - medium quality image (medium ISO 200), medium fast shutter speed (1/500 of a second), shallow depth of field (f4)
- Scenario 3 - lower quality image (high ISO 400), fast shutter speed (1/1000 of a second), shallow depth of field (f4)
Again, each scenario will give us a different effect - do we want high quality images? Do we want stopped action? Knowing the answer to this tells us which scenario to pick. But again, to know that answer, we have to know what story we are trying to tell.
As we move down the scenarios we are compromising image quality (higher ISO) but we gain the ability to FREEZE ACTION (very fast shutter at 1/1000 second (one one thousandths of a second)) and have a VERY SHALLOW DEPTH OF FIELD (small aperture number meaning the aperture is wide open). Scenario 3 would be a common setting at a sporting event where you want to freeze the action...(a goal or touchdown or the action at home plate or kids splashing water in a pool) while getting rid of the clutter in the background by using a shallow depth of field (blurring the background) but it comes at the cost of some image quality.


Auto ISO
By turning on auto ISO, you give the camera permission to adjust ISO if it has to. Remeber that ISO is how sensitive your camera is to light. A high ISO will result in grainy images so unless you want a grainy look for your story, you always want to intentionally set ISO and keep it as low as possible. When Auto ISO is on, the camera will try to keep ISO as low as it can but it WILL raise the ISO if you've selected exposure settings that necessitate an ISO adjustment. I personally almost never use Auto ISO. You can have poor exposure settings and not realize that it's cranking up the ISO only to get home and find very grainy images. I had rather be in control of my ISO and be forced to pick the correct shutter and aperture settings in the moment for that ISO choice. My only exception to this is that I will occassionally use it when shooting fast moving wildlife in variable lighting conditions.
Camera Shooting Modes
Auto
Exactly as it sounds, the camera is setting all the settings to get the best exposure it can. You have no control over what it picks. This setting will use Auto ISO.
Program (P)
The camera sets all the settings for you. However, in P mode, you can override the camera's choices for shutter and aperture. If you have ISO in Auto ISO mode, it sets the ISO, otherwise it leaves ISO at the value you've selected and just adjusts shutter and aperture. It will always try for a shutter speed that can be handheld.
Shutter Priority (S or Tv)
This allows you to select the shutter speed then the camera adjusts the aperture for you for a correct exposure. If Auto ISO is on, it may also adjust the ISO.
Aperture Priority (A or Av)
This allows you to select the aperture then the camera adjusts the shutter speed for you for a correct exposure. If Auto ISO is on, it may also adjust the ISO.
Manual (M)
This allows you to set shutter speed, aperture and ISO. The camera will not make any adjustments for you. It will be up to you to select settings that give a properly exposed image (or the exposure you want which in some cases may be intentionally over or underexposed). You will need to use your camera's meter to know if your settings are going to give you a properly exposed image. If Auto ISO is on, you set shutter and aperture and the camera will adjust ISO.
Setting Exposure in Manual Mode
- Keep ISO as low as possible (i.e. 100 if you can)
- Figure out what effect will help tell your story (sometimes the "effect" may simply be a shutter speed that is fast enough to hand hold if you aren't using a tripod)
- Set the aperture or shutter that will give the effect you want. (If hand holding is the "effect" you want, 1/60 second (or faster if possible) is a safe shutter speed range)
- Compensate for the overall light entering the camera with the other one (see metering below to know when you have a proper exposure)
- Raise ISO only if you have to in order to get your effect.
Pro Tip: Use a Timer with Slow Shutters
You will find there is a range of shutter speed where you may get motion blur just from tapping the shutter button WHILE IT'S ON A TRIPOD. It's usually not a problem with super slow shutters (>=2 seconds) and it's not a problem with faster shutters (>=1/30 of a second) but that range between can be problematic. Simply use your camera's timer to trigger the shutter. Many cameras will have a 2 or 5 second timer and either of these is plenty of time for the camera to quit jiggling on the tripod after you tap the shutter before it takes the image.
Metering
Know What You're Going to Get
Your camera will have a way to measure light and tell you if your image will be too bright (overexposed) or too dark (underexposed) with the exposure settings you have selected. This gives you the opportunity to make adjustments to those settings to adjust your exposure for a properly exposed image (or to get the exposure you want to tell your story - sometimes that may be intentioinally over/under exposed).
Exposure Meter

All cameras will have some sort of scale indicator (the +/- scale at the bottom of the above image) as to whether the settings you've chosen will cause the image to be overexposed (too bright) or underexposed (too dark). In this example, the image will be slightly overexposed (the ticks are toward the "+" side of 0 (0 is properly exposed).
Histogram

Some cameras will have a histogram overly. If your camera has the ability to display a histogram, always use this to set your exposure. In general, the graph represents all the points (pixels) in your image. If points on the graph are at the complete left side, they are totally black. If points on the graph are at the complete right side, they are totally white. In general, you want to set an exposure that has little or no points at either extreme. A "hump" of points in the middle indicates a good balance. You will rarely have a "perfect" hump in the dead center and nothing at either end. The idea is to try to not have anything at the extremes and put the majority of the hump as near the middle as possible. If the hump is more to the left, the image will be dark. If the hump is more to the right, the image will be light. This example has a good balance of midtones (most of the major humps are not at the extremes and more near the middle) but it will be slightly lighter overall (because the majority of the hump is slightly to the right of the middle) but there will be a few pixels totally white (far right side). I would probably shift the exposure to the left a bit more and underexpose the whole image a bit to try to get some of those pixels out of the totally white zone. As long as pixels aren't totally black or totally white, you can bring them out and correct the overall exposure balance in editing. You can do NOTHING in editing with totally white or totally black pixels. So if you have to pick between over/underexpose the whole image or have points at one of the far sides, always try to move points away from the far sides even if your overall image becomes over/under exposed. You can fix general exposure in editing but you can't fix totally black or white pixels.